

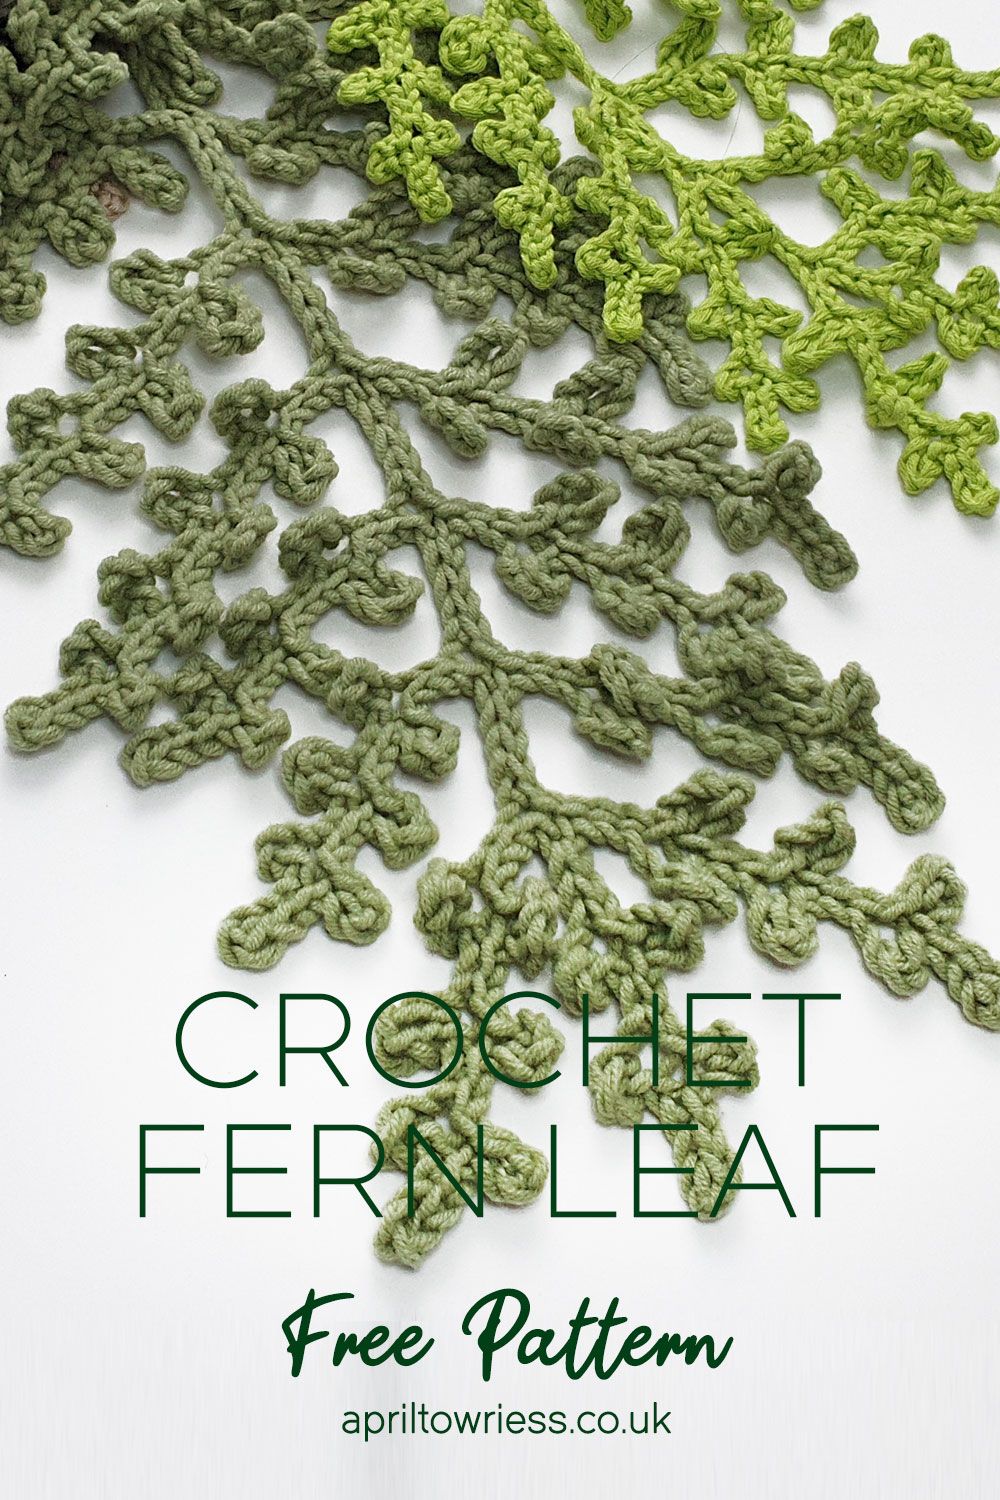
How to Crochet a Fern Leaf: A Complete Step-by-Step Video Tutorial Guide
If you’ve ever wandered through a forest and paused to admire the delicate, feathery arc of a fern frond, you already understand the inspiration behind one of crochet’s most elegant motifs. The crochet fern leaf is a versatile, satisfying project that works beautifully as a standalone decoration, an appliqué for garments, a bookmark, or part of a larger nature-themed blanket or wall hanging. Whether you’re a beginner looking for a manageable small project or an experienced crocheter eager to add something organic and textured to your repertoire, this complete tutorial guide will walk you through everything you need to know.
This post accompanies a full video tutorial that breaks down every step visually, so you can pause, rewind, and follow along at your own pace. But even if you’re reading without the video, the written instructions here are detailed enough to get you from a slip knot all the way to a finished fern leaf you’ll be proud of.
Why Crochet a Fern Leaf?
Before we dive into the stitches, it’s worth taking a moment to appreciate why the fern leaf has become such a beloved motif in the crochet community. Ferns are one of nature’s oldest plants, and their graceful symmetry translates remarkably well into fiber art. Unlike a simple flower or geometric shape, a fern leaf has a sense of movement and dimension that makes it look impressively complex even when the underlying technique is quite approachable.
From a practical standpoint, a crochet fern leaf is small enough to complete in a single sitting, making it a perfect project for an afternoon or a lazy evening. It uses very little yarn, so it’s an excellent way to use up leftover skeins from other projects. And because the shape is so distinctive, even a single finished leaf pinned to a hat, stitched onto a tote bag, or framed behind glass makes a striking visual statement.
Fern leaf motifs are also extremely popular in home décor right now. Botanical and biophilic design trends have made green, nature-inspired elements a staple of modern interiors, and handmade crochet pieces fit beautifully into that aesthetic. If you’ve been searching for a project that feels both timely and timeless, this is it.
Materials You’ll Need
Getting your materials together before you begin will make the crocheting process much smoother. Here’s what you’ll need for a standard fern leaf motif:
Yarn: A light worsted weight or DK weight yarn in green works best for a realistic fern look. You can use a single shade of green for a clean, graphic effect, or use two slightly different greens to create a subtle gradient from stem to tip. Cotton yarn gives a crisp, defined stitch definition that works beautifully for this kind of detailed motif, but acrylic yarn is perfectly fine and often more readily available.
Hook: A 3.5mm to 4.5mm crochet hook depending on your yarn weight and personal tension. Check the recommended hook size on your yarn’s label and use that as your starting point. If your stitches are looking too loose and lacy, go down a hook size. If they’re tight and stiff, go up a size.
Scissors: A small, sharp pair of embroidery scissors or craft scissors for clean yarn cuts.
Yarn needle: A blunt tapestry needle for weaving in your ends neatly at the finish.
Stitch markers (optional): Helpful for marking the beginning of rounds or key reference points if you’re new to reading crochet patterns.
Blocking supplies (optional but recommended): A foam blocking mat, rust-proof pins, and a light spray bottle filled with water. Blocking your finished fern leaf makes a significant difference in how crisp and professional it looks.
Understanding the Stitches
If you’re fairly new to crochet, you’ll want to make sure you’re comfortable with the following stitches before starting. More experienced crocheters can skim or skip this section.
Slip stitch (sl st): The flattest crochet stitch, used primarily for joining or moving your yarn to a new position without adding height.
Chain stitch (ch): The foundation of most crochet projects and the building block for the fern’s central stem and branch arms.
Single crochet (sc): A short, dense stitch that creates a tight, firm fabric. You’ll use this along the edges of the fern leaf to create clean lines.
Half double crochet (hdc): Slightly taller than a single crochet, this stitch adds a bit of height and softness. It’s useful for creating the subtle curve at the base of each frond.
Double crochet (dc): The most commonly used stitch in this pattern. Double crochet stitches form the body of each leaflet along the fern’s branches.
Slip stitch picot: A simple decorative technique where you work a small chain and then slip stitch back into the base stitch to create a pointed tip. This is what gives each individual leaflet its characteristic pointed end.
If any of these stitches are unfamiliar, the accompanying video tutorial includes slow close-up demonstrations of each one before incorporating them into the pattern. Take the time to practice them individually on a swatch before you begin the full leaf.
Reading the Pattern
Crochet patterns use standard abbreviations, and this one is no exception. Throughout the written instructions below, you’ll see the following shorthand:
ch = chain, sl st = slip stitch, sc = single crochet, hdc = half double crochet, dc = double crochet, sp = space, rep = repeat, and an asterisk (*) indicates a section to be repeated as instructed.
The pattern is worked in a back-and-forth method along a foundation chain, which serves as the central stem of the fern. Each leaflet branch is worked outward from the stem and then you return to the stem to begin the next one. This creates the classic alternating branch structure of a real fern frond.
Step-by-Step Crochet Fern Leaf Pattern
Step 1: Create the Foundation Chain (The Central Stem)
Begin with a slip knot and chain 31. This gives you the main spine of your fern leaf. If you want a larger leaf, you can chain 41 or 51, adding 10 chains at a time and adjusting the number of leaflet branches accordingly.
Take a moment to check your chain. It should lie flat and have a relaxed tension — not so tight that the chain curls in on itself, and not so loose that there are noticeable gaps between stitches.
Step 2: Work the First Branch
Skip the first 3 chains from your hook (these count as your first double crochet). Now you’ll work the first leaflet branch:
Chain 10. Into the 4th chain from the hook, work 3 double crochets. Then work 1 double crochet into each of the next 5 chains. Work 1 slip stitch into the next chain along the foundation stem. This completes your first leaflet.
Chain 10 again. Work 3 double crochets into the 4th chain from the hook, then 1 double crochet into each of the next 5 chains. Slip stitch into the next chain along the foundation stem.
You’ve just completed your first pair of leaflets, one on either side of the stem. This is the basic repeating unit of the entire fern leaf.
Step 3: Continue Working Along the Stem
Continue the pattern of working two leaflets (one pair) for every two chains along the foundation stem. The alternating placement — working one leaflet to the right and one to the left before moving up the stem — is what creates the natural, feathery appearance of the fern.
As you work your way up the stem toward the tip of the leaf, each pair of leaflets should naturally appear slightly smaller and more tightly set together. You can achieve this effect by gradually reducing the number of double crochets in each branch as you near the top — for example, dropping from 6 double crochets per branch to 4, and then to 2 in the final two or three pairs.
Step 4: Work the Leaf Tip
When you reach the last few chains of your foundation, work a single final leaflet rather than a pair. This solitary leaflet at the top of the fern creates the characteristic pointed tip of a real frond.
For the tip leaflet, chain 8, work 3 double crochets into the 4th chain from the hook, then 1 double crochet into each of the remaining chains, and slip stitch back to the final stitch of your foundation chain.
Step 5: Work Back Down the Opposite Side
Now you’ll work back down the other side of the foundation chain to complete the second half of the leaf. Turn your work so the reverse side of the foundation chain faces you.
Working into the unused loops of the foundation chain, slip stitch into each chain until you reach the base of the next intended leaflet position. Work mirror-image leaflet branches back down toward the base of the stem, matching the pairs you created on the way up.
This is where following along with the video is especially helpful, as the spatial orientation of turning your work and reading the underside of the foundation chain can feel a little confusing in written form the first time you do it.
Step 6: Finish the Base
When you’ve worked back to the very base of the stem, work 3 single crochets into the final chain to create a small rounded base. This gives the leaf a natural stem-like ending rather than a raw edge.
Fasten off, leaving a tail of about 6 inches for weaving in.
Finishing Touches
Weaving In Your Ends
Thread your yarn tail onto the tapestry needle and weave it through several stitches on the wrong side of the leaf, following the direction of the stitches to keep the end secure and invisible. Repeat with any other yarn ends. Clip the tails close to the fabric without cutting the stitches themselves.
Blocking Your Fern Leaf
Blocking is the step that transforms a good crochet piece into a great one, and for the fern leaf especially, it makes a dramatic difference. Lightly mist your finished leaf with water until it’s damp but not soaking. Place it on your foam blocking mat and gently shape it into the curve of a natural fern frond — slightly arched, with the individual leaflets spread out evenly on both sides of the stem. Use rust-proof pins to hold the shape in place and allow it to dry completely, which usually takes a few hours or overnight.
Once unpinned, your fern leaf will hold its graceful curved shape beautifully.
Ways to Use Your Crochet Fern Leaf
Once you’ve made one fern leaf, you’ll probably find yourself wanting to make dozens. Here are some ideas for how to use them:
A single fern leaf makes a stunning bookmark when stiffened lightly with fabric stiffener or a diluted white glue solution. The flat, elongated shape fits perfectly between book pages and is a lovely handmade gift for readers in your life.
Stitch several fern leaves together along a wire stem wrapped in floral tape to create a botanical arrangement that looks remarkably like real foliage. These make gorgeous centerpieces, wreath elements, or additions to potted plant displays.
Fern leaf appliqués are beautiful on clothing and accessories — think a knit sweater, a denim jacket, a canvas tote bag, or a wide-brimmed hat. Stitch them down with a matching thread for a permanent application, or attach a small brooch pin to the back to make the leaf removable.
If you’re working on a nature-themed blanket or tapestry, crochet fern leaves make excellent accent motifs between larger flowers or geometric panels. Their slender shape fills long, narrow spaces beautifully.
For wrapping gifts, a finished fern leaf tied onto a ribbon or twine bow elevates simple kraft paper wrapping into something genuinely special. It’s a gift within a gift.
Troubleshooting Common Issues
My leaflets are curling inward. This usually means your tension is too tight. Try going up a hook size, or consciously relax your grip on the yarn as you work. Blocking will also help significantly with curling.
The leaflets look uneven or lumpy. Check that you’re counting your chains accurately at the start of each branch. An extra or missing chain will throw off the symmetry. It’s worth using a stitch marker at the 4th chain from the hook as a reference point until the rhythm feels natural.
The stem is twisting. This can happen if your foundation chain is twisted before you begin working into it. Try to keep the chain flat from the start and avoid pulling it out of alignment as you work your first few stitches.
I’m running out of yarn before finishing the leaf. If you’re working from a very small yarn remnant, try a smaller hook size or shorten the foundation chain slightly. You can make a beautiful, proportionally correct fern leaf at almost any size as long as you reduce the chain length and leaflet counts consistently.
Expanding the Pattern: Making a Fern Garland
Once you’ve mastered the basic fern leaf, one of the most popular next steps is making a fern garland. Work a series of fern leaves in varying shades of green — from deep forest green to bright chartreuse — and connect them end to end with a length of chain stitch or a simple crocheted cord. The result is a lush, whimsical garland that works beautifully above a mantelpiece, draped across a bookshelf, or strung along the edge of a table for a botanical-themed event.
For a more structured garland, sew each leaf onto a piece of jute twine at intervals of about 4 to 6 inches, alternating the angle of each leaf to create a naturalistic branching effect.
Final Thoughts
The crochet fern leaf is one of those patterns that rewards every level of crocheter. Beginners will find it a confidence-building project that produces something genuinely beautiful. Intermediate crocheters will appreciate the rhythm and structure of the repeating leaflet pattern. And advanced makers will enjoy the creative possibilities that open up once the basic motif is mastered — experimenting with texture, scale, color, and application.
Most importantly, there’s something deeply satisfying about creating something that echoes the natural world. Ferns have been growing on this earth for over 360 million years. When you pick up your hook and yarn and start working that first branch, you’re participating in a very long tradition of human beings finding beauty in the shapes that surround us, and finding ways to carry those shapes into the objects we make and use every day.
If you found this tutorial helpful, please share it with a fellow crocheter, leave a comment with a photo of your finished leaf, and subscribe so you don’t miss the next project in this botanical crochet series. Happy crocheting!